
16 KiB
The Original IBM PC in Your Browser
Welcome to pcjs.org and PCjs, the first IBM PC simulation to run in your web browser without any plugins. It was added to the JavaScript Machines project in Fall 2012. The project now includes:
- PCjs, a simulation of the original IBM PC (circa 1981)
- C1Pjs, a simulation of the OSI Challenger 1P (circa 1978)
All our simulations are written entirely in JavaScript. No Flash, Java or other plugins are required. Supported browsers include recent versions of Internet Explorer (v9.0 or later), Safari, Chrome, Firefox and various mobile browsers.
The simulation above features an Intel 8088 running at 4.77Mhz, with 64Kb of RAM and an IBM Monochrome Display Adapter. For more control, there are also Control Panel and Soft Keyboard configurations, featuring the built-in PCjs Debugger. For even greater control, build your own PC. The PCjs Documentation will help you get started.
The goals of the JavaScript Machines project are to create fast, full-featured simulations of classic computer hardware, help people understand how these early machines worked, make it easy to experiment with different machine configurations, and provide a platform for running and analyzing old computer software.
Demos
Some pre-configured machines are shown below, ready to run BASIC, DOS, Windows 1.01, and assorted non-DOS software.


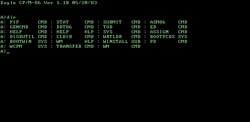
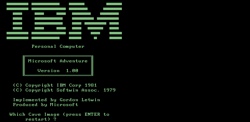
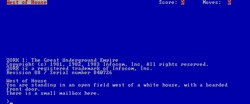
Check out the rest of the PCjs Application, Boot Disk and Machine demos, including the IBM PC XT "Server Array" and Windows 1.01 "Server Array" demos of multiple PCs running side-by-side.
C1Pjs
Below is the OSI Challenger C1P, another simulation in the JavaScript Machines project. It simulates Ohio Scientific's 6502-based microcomputer, released in 1978. More details about this simulation and the original machine are available in the C1Pjs Documentation.
Developer Notes
The PCjs repository on GitHub contains everything needed to start a local copy of the PCjs web server and run PCjs simulations:
- A simple Node-based web server (server.js)
- Custom Node modules used by the web server (HTMLOut, MarkOut, DiskDump, FileDump)
- An assortment of IBM PC and C1P machine XML files (in /apps, /devices and elsewhere)
- The PCjs and C1Pjs client applications, both "compiled" and uncompiled
- A smattering of PCjs and C1Pjs documentation, along with blog posts, related publications and more
The PCjs web server is not required to run most PCjs simulations. Any web server (Node, Apache, Nginx, etc) that can serve the necessary JavaScript files to your browser will work. However, instructions for doing that are beyond the scope of this "Quick Start" document. And while it is possible to create simulations that require access to PCjs web server APIs, none of the simulations in the repository should require API access.
Installing PCjs
The following instructions were written for OS X users. However, users of other operating systems should have no problem following along. There are some prerequisites:
- Git (included with OS X Developer Tools; separate download required for Windows)
- Python (used by NPM and included with OS X; separate download required for Windows)
- Node with NPM (download an appropriate installation package from nodejs.org)
Once you have the prerequisites, open a command-line window, cd to the directory where you'd like to install PCjs,
and type the following commands:
git clone git@github.com:jeffpar/pcjs.git pcjs
cd pcjs
npm install
node server.js
Now open a web browser and go to http://localhost:8088/. Done!
If you just want to launch the web server or don't plan to do any development, you can reduce the footprint slightly by asking NPM to install only "productions" modules (which can also eliminate some errors if, for example, you neglected to install Python):
npm install --production
If you ever inadvertently run npm install without --production, you can easily uninstall all the
"devDependencies" listed in package.json with this command:
npm prune --production
Finally, when installing on an AWS server, although you have complete control over how Node is launched, you don't have direct control over NPM; the best you can do is set the following AWS "Environment Property":
NPM_CONFIG_PRODUCTION=true
The current version of Node (0.10.32 at the time of this writing) should work fine, but version 0.10.26 is what's been used to develop and test PCjs so far.
Also, server.js was originally written using Express v3. Since then,
Express v4 has been released, but the npm install command above will make sure that v3 is installed locally.
The plan is to eventually move development to a newer version of Node, and migrate the PCjs server to a newer version of Express; there's no desire to remain stuck in the past (well, ignoring the fact that PCjs is the quintessential "stuck in the past" project), but there's also no urgency to update.
Building PCjs
Unlike a typical project, where you have to build or configure or make something, PCjs is "ready to run". That's because both the compiled and uncompiled versions of PCjs are checked into the project, making deployment to a web server easy.
However, in order to build and test PCjs modifications, you'll want to use Grunt and the Grunt tasks defined by Gruntfile.js.
Although Grunt was installed locally when you ran npm install, you'll also want to install the command-line
interface to Grunt; you can install that locally as well, but it's recommended you install it globally (use "-g"):
sudo npm install grunt-cli -g
Now you can run grunt anywhere within the PCjs project to build an updated version. If no command-line arguments
are specified, grunt runs the "default" task defined by Gruntfile.js; that task runs Google's
Closure Compiler if any of the target files (eg, pc.js or pc-dbg.js
in the /versions directory) are out-of date.
To ensure consistent compilation results, a copy of the Closure Compiler has been checked into the bin folder. This version of Closure Compiler, in turn, requires Java v7 or later. Use the following commands to confirm that everything is working properly:
java -version
which should report a version >= 1.7; eg:
java version "1.7.0_67"
Java(TM) SE Runtime Environment (build 1.7.0_67-b01)
Java HotSpot(TM) 64-Bit Server VM (build 24.65-b04, mixed mode)
Then run:
java -jar bin/compiler.jar --version
which should report:
Closure Compiler (http://code.google.com/closure/compiler)
Version: v20140407
Built on: 2014/04/07 14:04
If you don't have Java installed, it's recommended that you install the JDK (not the JRE), because the JRE may not update your command-line tools properly. Note that Java is used only by the Closure Compiler; none of the PCjs client or server components use Java.
Newer versions of the Closure Compiler should work as well, and at some point, a newer version will be checked into the project.
Using PCjs
From The Browser
The PCjs web server is little more than a file/directory browser for the PCjs project, plus a collection of APIs.
If a URL corresponds to a PCjs project folder and no "index.html" exists in that folder, the server loads an HTML template (common.html) and generates an "index.html" for that folder.
The contents of the "index.html" will vary depending on the contents of the folder; for example, if the folder contains a README.md, then that file is converted to HTML and embedded in the "index.html". Similarly, if the folder contains a machine XML file, that is embedded as well.
From The Command-Line
The PCjs client app can also be run from the command-line mode using Node, making it possible to script the application, run a series of automated tests, etc:
cd my_modules/pcjs-client/bin
node pcjs
The pcjs script in my_modules/pcjs-client/bin loads all the PCjs browser scripts listed in the root package.json and then starts a Node REPL ("read-eval-print loop"). The REPL handles a few special commands (eg, "load", "quit") and passes anything else to the PCjs Debugger component. If no Debugger component has been created yet, or if the Debugger didn't recognize the command, then it's passed on to eval(), like a good little REPL.
Use the "load" command to load a JSON machine configuration file. A sample machine.json is provided in the bin directory, which is a "JSON-ified" version of the machine.xml displayed on the pcjs.org home page.
The command-line loader creates all the JSON-defined machine components in the same order that the browser creates XML-defined components. You can also issue the "load" command directly from the command-line:
node pcjs --cmd="load machine.json"
In fact, any number of "--cmd" arguments can be included on the command-line. A batch file syntax will eventually be added, too.
When PCjs runs in a browser, an XML machine configuration file is transformed into HTML with a set of DIVs for each component: an "object" DIV whose data-value attribute provides the initialization parameters for the corresponding component, along with a set of optional "control" DIVs that the component can bind to (eg, a "Run" button, or a visual representation of DIP switches, or whatever).
When PCjs is run from the command-line, there is no XML, HTML, or DIVs involved; this is basically a "headless" version of PCjs, so there is no simple way to view a machine's video display or interact with its keyboard, mouse, etc. You have to use Debugger commands to dump the machine's video buffer.
Since I was not inclined to add XML support to my Node environment, this has created some divergence between client and server operation: PCjs on the client supports only XML machine configuration files, whereas PCjs on the server supports only JSON machine configuration files.
I haven't decided whether I'll add support for JSON configuration files to the client, or add some XML-to-JSON conversion to the server, or both.
Debugging PCjs
Server Components
To help test/debug changes to PCjs server components (eg, DiskDump, HTMLOut), you can start the server with some additional options; eg:
node server.js --logging --console --debug
The --logging option will create a node.log that records all the HTTP requests, --debug
will generate additional debug-only messages (which will also be logged if --logging is enabled), and --console
will replicate any messages to your console as well.
If you want server.js to use a different port (the default is 8088), set PORT in your environment before starting the server:
export PORT=80
A complete list of command-line options can be found in server.js.
Client Components
A special parameter ("gort") can be appended to the URL to request uncompiled client source files, making PCjs and C1Pjs much easier to debug, albeit much slower:
http://localhost:8088/?gort=debug
The "gort=debug" command is unnecessary if the server is started with --debug; the server always serves uncompiled
files when running in "debug mode".
Conversely, if the server is running "debug mode" but you want to test a compiled version of PCjs, use:
http://localhost:8088/?gort=release
and the server will serve compiled JavaScript files, regardless whether the server is running in "debug mode" or "release mode".
Another useful gort command is "gort=nodebug", which is like "debug" but also sets the client-side DEBUG variable to false, disabling all debug-only runtime checks in the client and allowing the simulation to run much faster:
http://localhost:8088/?gort=nodebug
Regrettably, the gort command "Klaatu barada nikto" is not yet recognized. Fortunately, there are no (known) situations where PCjs could run amok and destroy the planet.
Other parameters that can be passed via the URL:
- autostart: set it to "false" to prevent all machines on the current page from automatically starting
For example:
http://localhost:8088/?gort=debug&autostart=false
Updating PCjs
Developing
To start developing features for a new version of PCjs, here are the recommended steps:
- Change the version number in the root package.json
- Run the "grunt promote" task to bump the version in all the machine XML files
- Make changes
- Run "grunt" to build new versions of the apps (eg, "/versions/pcjs/1.xx.yy/pc.js")
However, you may want to skip step #2 until you're ready to start testing the new version. Depending on the nature of your changes, it may be better to manually edit the version number in only a few machine XML files for testing, leaving the rest of the XML files pointing to the previous version. Run "grunt promote" when the new version is much closer to being released.
Testing
In the course of testing PCjs, there may be stale "index.html" files that prevent you from seeing application updates, changes to README.md files, etc. So before running Node, you may want to "touch" the default HTML template:
touch my_modules/shared/templates/common.html
The HTMLOut module compares the timestamp of that template file to the timestamp of any "index.html" and will regenerate the latter if it's out-of-date.
There's a TODO to expand that check to include the timestamp of any local README.md file, but there are many other factors that can contribute to stale "index.html" files, so usually the safest thing to do is "touch" the common.html template, or delete all existing "index.html" files, either manually or with the Grunt "clean" task:
grunt clean
More Information
Learn more about the JavaScript Machines project and PCjs. To create your own PCjs machines, see the Documentation for details.
If you have questions or run into any problems, you're welcome to tweet or email.